Why more golfers install shafts themselves
Golfers are ditching $120 re-shafting jobs because they can do it better—and cheaper—at home. It’s not just about saving money; it’s about control. When you install your own shafts, you choose the exact flex, weight, and torque profile that matches your swing. That means tighter shot dispersion and more confidence on the tee.
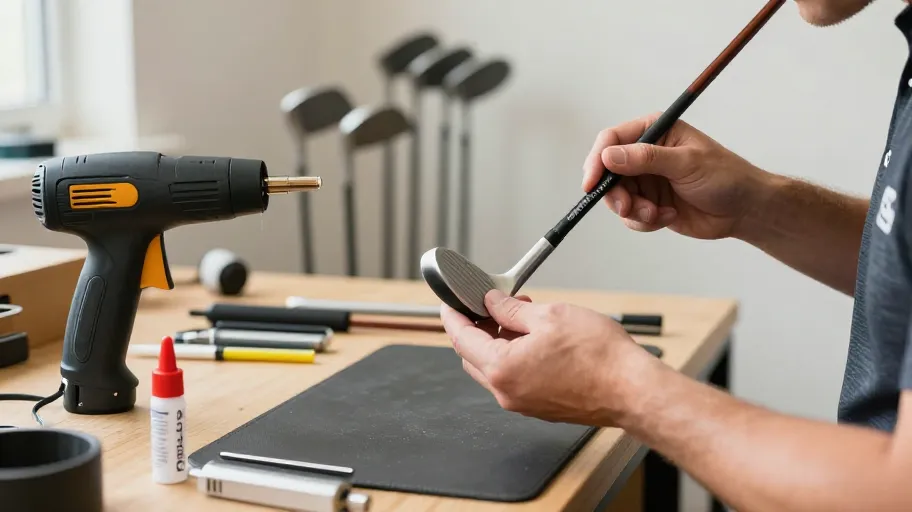
Essential tools for reliable results
Forget guesswork. Reliable home installations come down to precision tools designed for real-world use. A digital heat gun with temperature feedback means you avoid overheating carbon fiber heads, because staying under 300°F prevents structural breakdown. That’s critical—you don’t want to turn a $300 driver into scrap.
Epoxy choices that make or break builds
Using hardware-store glue means risking total shaft failure under swing loads, because those adhesives aren’t engineered for dynamic stress. In contrast, aerospace-grade epoxies deliver shear strength over 3,600 psi—meaning they hold firm even during 120 mph downswings.
Safely removing old shafts
Removing a shaft safely means applying controlled heat at 250°F for 8–12 minutes, because that softens the epoxy without harming composite materials. Exceeding 300°F risks delamination—especially in high-performance drivers—and research confirms irreversible damage starts above that threshold.
Achieving perfect shaft alignment
Perfect alignment means returning the clubface square at impact, because even 1.2° of rotational error adds about 15 feet of lateral miss at 150 yards. TrackMan data shows this can improve shot consistency by up to 30%—turning wild drives into fairway finders.
Master Your Swing, DIY Your Fit. DIY Golf is the premier destination for the technical golfer. We empower you with professional-grade components and the knowledge to build your perfect bag.
Leave a Reply