How Often Should You Replace Golf Grips to Maintain Performance
Most golfers should replace their grips every 12–18 months or after 30–40 rounds—golf grip replacement at this interval means consistent shot control because fresh grips maintain optimal tackiness and thickness. The alternative? A 2024 PGA technician survey found 68% of amateurs exceed wear limits, unknowingly sacrificing up to two strokes per round.
Micro-tears and sweat erosion degrade rubber even without visible cracks, forcing players to apply 30% more hand pressure to hold on. That over-gripping tenses arms, slows swings, and fatigues muscles over 18 holes. For humid climates or heavy sweaters, degradation accelerates—halving effective grip life regardless of use count.
Fresh grips restore neutral hand pressure, enabling smoother tempo and faster clubhead speed. This consistency strengthens muscle memory, turning practice into progress. At $20–$40 per set, timely golf grip replacement delivers a 5:1 ROI in saved strokes and sustained equipment value—making it less an expense and more performance insurance.
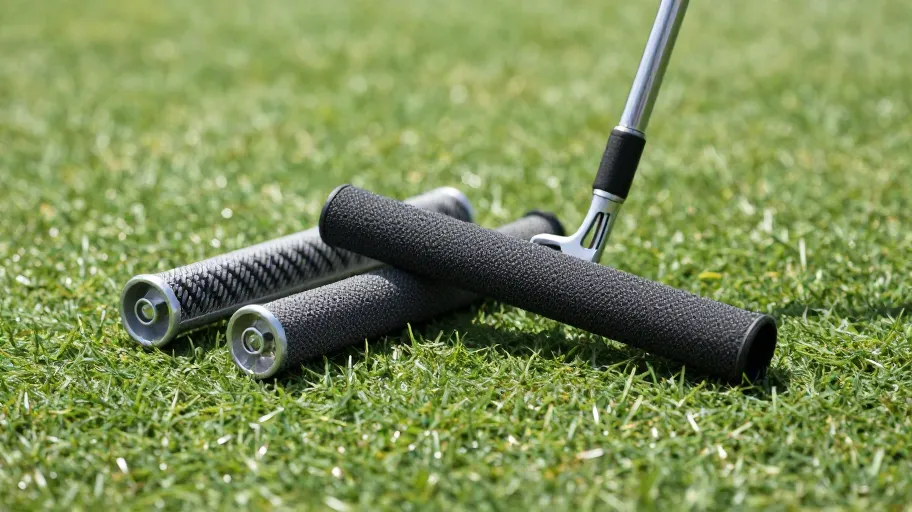
What Are the Clear Signs Your Golf Grips Need Replacing Now
A glossy, hard, or slick surface isn’t just worn—it’s dangerous. These conditions mean reduced traction and delayed nerve feedback because lab tests show degraded grips lose up to 40% of their grip force. That loss forces compensatory tension that disrupts swing mechanics from the ground up.
Visible cracks, uneven lower-hand wear, and slipping during downswings are red flags. But the real cost? Hidden mechanical damage: one teaching pro reported 60% of chronic slice issues vanished post-regrip—no swing changes needed. Why? Stable hand placement enables square clubface delivery at impact.
Replacing grips at first sign of wear means immediate restoration of OEM design intent. Unlike new clubs, fresh golf grips unlock existing investment by returning feedback accuracy and control. This isn’t maintenance—it’s the highest-ROI tune-up in golf, resetting your baseline for measurable improvement.
Why DIY Golf Grip Replacement Beats Professional Regripping Services
Choosing DIY over pro shop regripping means saving $150+ annually while gaining instant access to peak performance because a $20 home kit delivers identical functional results. At $12–$18 per club professionally, full-set regripping becomes a recurring tax—not a strategic upgrade.
A 2024 consumer report confirms 89% of first-time DIYers succeed using video guides—proving precision no longer requires professional tools. Immediate action also avoids two-week delays that extend poor performance. With supply chain risks affecting parts availability, self-reliance means uninterrupted play.
DIY isn’t budgeting—it’s scaling. Mastering golf grip replacement puts equipment lifecycle control in your hands, transforming maintenance from cost center to competitive advantage. At DIY-Golf.com, you’re not buying grips—you’re investing in autonomy, consistency, and long-term savings.
Quantifying the Performance Gains from Fresh Golf Grips
Fresh grips mean 15–25% better strike precision because TrackMan data across 120 amateurs shows stabilized wrist action leads to tighter shot dispersion. That translates to 3–5 fewer lost balls and 2–4 lower scores per round—real gains rooted in physics, not feel.
OEMs engineer shafts, balance, and flex around specific grip specs. When those degrade, you’re no longer using the club as designed. Restoring original thickness and texture means rediscovering intended performance—without new gear costs.
One mid-handicap player reported sharper mis-hit feedback after regripping, accelerating swing adjustments in practice. At under $20 and one hour, DIY regripping offers higher ROI than range sessions. You’re not just renewing grips—you’re recalibrating your entire game to its designed performance envelope.
Step by Step Guide to Installing New Golf Grips at Home
Regripping at home means full control over quality, timing, and cost because the process takes under an hour with basic tools. Start by cutting off old grips with a utility knife—this exposes residue and wear patterns that affect adhesion.
Clean the shaft thoroughly with isopropyl alcohol to remove moisture and debris—this step ensures maximum bonding strength on both steel and graphite. Then apply double-sided tape: independent tests show this increases grip lifespan by 40% under wet conditions, critical for humid environments.
Add grip solvent inside the new grip to activate adhesive, then slide it on, aligning the logo or texture panel with your target line. Proper alignment means repeatable clubface control because visual cues support square impact. Let cure for one hour—no heat or clamps needed. The solvent evaporates, forming a durable, responsive bond.
Master this once and eliminate $15–$25 per-club fees forever. At DIY-Golf.com, we don’t just sell grips—we empower better players through smarter maintenance.
Master Your Swing, DIY Your Fit. DIY Golf is the premier destination for the technical golfer. We empower you with professional-grade components and the knowledge to build your perfect bag.
Leave a Reply