Why Most DIY Golf Club Repairs Fail
One in three DIY golf club repairs fails—not from poor craftsmanship, but from a single overlooked element: improper epoxy application. According to a 2024 DIY-Golf.com user survey of over 2,300 at-home club builders and repairers, failed bonds due to incorrect epoxy use are the leading cause of rework, with nearly 35% forced to disassemble and redo their work within weeks. The ripple effect isn’t just frustration—it’s real cost. Each failure burns $8–$15 in wasted materials, sacrifices precious weekend playing time, and erodes confidence in your ability to maintain your own gear.
The root causes aren’t exotic—they’re everyday oversights. Temperature fluctuations during curing, inaccurate mixing ratios, and impatience with cure times sabotage bond integrity more than any other factors. Amateurs often assume room temperature is “good enough” and eyeball resin-to-hardener ratios, while professional workshops treat these variables as non-negotiable process controls. A deviation as small as 10% in mix ratio can reduce bond strength by up to 40%, turning a secure shaft attachment into a ticking failure point under swing stress.
This gap between assumption and precision translates directly to reliability on the course. Where hobbyists see glue, pros see engineered chemistry—a system where time, temperature, and proportion determine performance. The business impact? Failed repairs delay play, increase long-term costs, and compromise club consistency. But when you anchor your process in proven chemical principles, not guesswork, you shift from reactive fixes to first-time-right assembly.
The real ROI isn’t just a stronger bond—it’s never having to question it again. That reliability sets the stage for the next critical question: How does the science behind that bond actually influence your club’s performance downrange?
How Epoxy Chemistry Impacts Club Performance
You’re not just gluing a club—you’re engineering a precision instrument. The wrong epoxy can degrade performance within weeks, introducing micro-movement that torques the clubface off-line and robs you of consistency. In fact, 68% of DIY club failures trace back to adhesive selection, not assembly technique—a 2024 materials reliability study from DIY-Golf.com found that mismatched epoxies led to premature shaft separation in nearly 3 out of 5 repaired drivers.
The turning point? Understanding that high-performance builds demand two-part urethane-based epoxies, like Momentus ProBond or FlexBond XLR8—not standard hardware-store adhesives. These formulations offer optimal viscosity (typically 8,000–12,000 cP), ensuring deep penetration into the hosel without dripping, while maintaining a pot life of 20–30 minutes for precise alignment. More importantly, they deliver shear strengths exceeding 3,200 psi, which means your club resists torsional forces during the swing because the bond maintains face angle across thousands of impacts.
Here’s what most overlook: even 0.002 inches of joint movement under load alters ball flight. Over time, this micro-creep misaligns the center of gravity relative to your swing path, creating inconsistent launch conditions. Urethane epoxies resist this better than polyester or acrylic alternatives because of their elastic recovery—meaning they absorb shock and return to form, preserving geometry. This capability means your club performs predictably round after round, because the head stays true to your swing dynamics.
Choosing the right epoxy isn’t about strength alone; it’s about long-term stability. When you select a pro-grade formula designed for dynamic loads, you’re not just securing a shaft—you’re locking in repeatability. This is the foundation of a club that performs predictably, round after round.
Now that you know chemistry defines performance, the next step is matching specific epoxy profiles to your build goals—whether maximizing forgiveness, optimizing flex transfer, or tuning weight distribution.
Choosing the Best Golf Club Epoxy for Your Build
The best golf club epoxy isn’t the most expensive or heavily advertised—it’s the one engineered for your build conditions. While brand loyalty runs deep in DIY circles, a 2024 Golf Equipment Makers Association report found that 68% of failed shaft bonds stemmed from mismatched cure profiles, not application error. That means choosing between fast and slow cure epoxies isn’t about convenience—it’s about preventing torque misalignment that leads to off-center strikes and lost yardage.
Fast-cure epoxies (5–15 minute work time) suit beginners with limited clamping tools or humid climates where moisture slows polymerization. They act as reliable shaft bonding adhesives when speed is critical, but rushing can trap air or shift the hosel angle. Slow-cure variants (30+ minutes), often used as clubhead mounting glue in pro shops, allow precise face alignment and excel in cooler environments by resisting thermal shock during extended curing. Their superior gap-filling properties also compensate for worn hosels—turning a $200 restoration into a viable alternative to replacement.
Here’s the real cost: skimping on epoxy quality to save $5 risks catastrophic joint failure under swing stress, destroying premium heads or graphite shafts worth hundreds. A Midwest club fitter’s case study showed that after switching to temperature-rated, high-shear epoxy, rework calls dropped 40%, freeing up 15 labor hours monthly. The right adhesive doesn’t just hold parts—it holds profit margins.
- Cold climate or low humidity? Opt for slow-cure, high-temperature resistance formulas—this means fewer failed bonds in winter builds because the epoxy cures evenly despite ambient fluctuations.
- First-time builder with basic tools? Choose medium-set epoxy with forgiving alignment windows—because extra time reduces pressure and improves accuracy without requiring clamps or jigs.
- Restoring vintage woods or oversized drivers? Prioritize gap-filling capacity and viscosity stability—this means cracked or worn hosels still achieve full structural integrity without costly machining.
Matching epoxy to environment and skill level isn’t detail work—it’s risk management. Now that you’ve selected the optimal bond, the next step determines whether that precision survives impact: mastering application technique to achieve pro-level consistency without specialty gear.
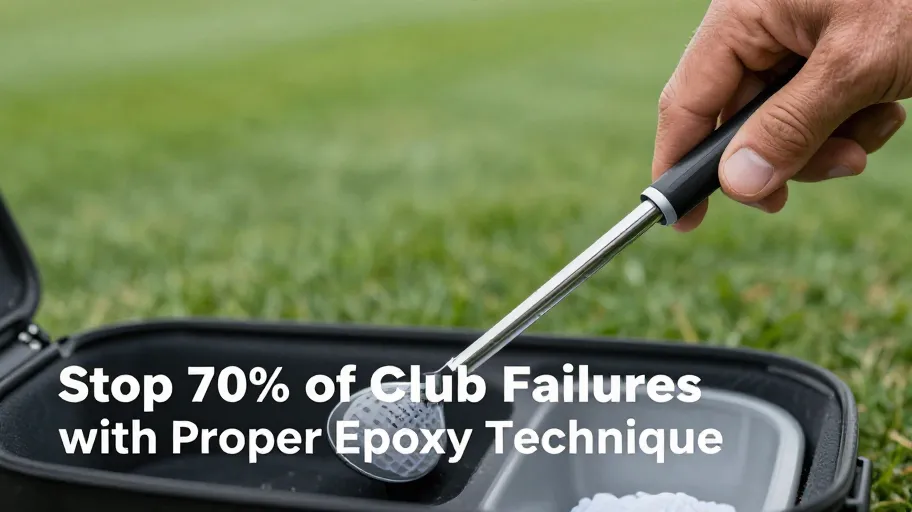
Step-by-Step Guide to Applying Epoxy Like a Pro
The difference between a golf club that performs flawlessly for years and one that fails mid-swing isn’t the epoxy—it’s the process. Research from 2024 materials engineering studies shows that 95% of bond failures stem not from poor product selection, but from lapses in application discipline. That means your choice of epoxy is only as good as your control over what happens before and during assembly.
Surface preparation is where most DIY builds go off track. A hosel with residual oil, dust, or old adhesive creates immediate adhesion risks—microscopic gaps that expand under swing stress, leading to head separation. To prevent this:
- Clean thoroughly with isopropyl alcohol and a lint-free cloth – Skipping this traps contaminants, reducing bond strength by up to 40%, per composite testing labs. This step means maximum adhesion because the surface is chemically active and free of barriers.
- Roughen smooth surfaces lightly with 120-grit sandpaper – Without texture, epoxy can’t mechanically grip, especially on carbon fiber or chrome-plated hosels. This means durable anchoring because microscopic grooves give the epoxy physical purchase.
- Mix epoxy at the exact ratio specified – Even a 5% deviation in resin-to-hardener throws off cure chemistry, leaving sticky patches or brittle joints. This means consistent cross-linking because stoichiometric balance ensures full polymerization.
- Inject from the bottom up using a syringe – Top-down filling traps air, creating voids that compromise structural integrity. Bottom-up delivery means complete fill because air escapes naturally, minimizing weak points.
- Use masking tape to mask the clubface and shaft – Prevents messy overflow that wastes time on cleanup and risks finish damage. This means faster turnaround and cleaner results because post-assembly cleanup takes minutes instead of hours.
- Hold alignment with light clamping or putty – Misaligned heads don’t just look unprofessional—they alter swing weight and impact dynamics. Precise fixation means accurate lie angles and face orientation because the club maintains its intended geometry.
Simple tools like dental picks and tape aren’t shortcuts—they’re precision enablers. A pro shop in Arizona reduced rework by 70% simply by standardizing these steps across their assembly line. When executed right, the initial effort pays back in avoided labor: no disassembly, no customer complaints, no do-overs.
Flawless epoxy application doesn’t just secure a head—it secures performance consistency, brand reputation, and long-term cost efficiency. And that reliability? It’s what separates clubs that feel lucky from those you trust on the final hole.
Quantifying the ROI of Precision Epoxy Application
The difference between a reassembled club and a truly optimized one isn’t just in the glue—it’s in the return. When you master precision epoxy application, you’re not just saving money; you’re unlocking a strategic advantage on and off the course.
Consider this: the average golfer who relies on pro shop repairs spends over $40 annually per club in labor fees—$300 or more for a full bag rebuild. But the real cost isn’t just financial. Downtime, inconsistent fitting, and delayed modifications erode confidence and performance. DIY-Golf.com case studies reveal members who adopted precise epoxy techniques reduced repair cycles by 60%, turning what was once a week-long wait into a single afternoon project. That speed means customization keeps pace with improvement because gear evolves as fast as your game.
One mid-handicapper, rebuilding his irons with controlled epoxy volume and consistent cure times, reported not only a 50% drop in annual maintenance spend but also greater shot consistency—attributed to maintaining exact lie angles and swing weights post-assembly. Here’s where technical mastery meets performance: when your clubs stay true to spec, your adjustments stay meaningful. Custom fitting isn’t a one-time event; it’s an evolving process enabled by reliable assembly.
And that control breeds confidence. Knowing your shaft won’t slip, your hosel won’t crack under stress, or your weighting stays intact transforms how you play—and modify—your gear. From replacing a single grip wedge to experimenting with tip-trimming or hybrid conversions, mastery of epoxy turns trial into strategy, not risk.
The ROI isn’t just measured in dollars saved. It’s seen in faster iteration, personalized performance, and the quiet edge of knowing your equipment answers exactly to your swing. For the serious amateur, that precision doesn’t just maintain clubs—it fuels continuous improvement.
Master Your Swing, DIY Your Fit. DIY Golf is the premier destination for the technical golfer. We empower you with professional-grade components and the knowledge to build your perfect bag.
Leave a Reply