How Often Should You Replace Your Golf Grips
Replace your golf grips every 12 to 18 months—or after 30 to 40 rounds—even if they look fine. For weekend players chasing lower scores, this isn’t upkeep; it’s performance tuning. Worn grips force you to squeeze harder, which ramps up hand tension and leads to slices and thin shots. PGA of America data shows 68% of amateurs with old grips apply too much pressure, wrecking control when it matters most.
Grip rubber hardens by about 25% in firmness over 18 months, killing shock absorption and robbing you of feedback. But the real damage starts before cracks appear. UV and ozone break down rubber at the molecular level, especially in standard models without protection. That’s where Compound Core Technology helps—it resists breakdown longer, so the core stays responsive. Paired with Dual-Tack Surface Design, these grips keep their texture and grip integrity round after round.
Treating replacement as routine calibration means consistent feel across your set, shot after shot. That consistency doesn’t just prevent errors—it builds confidence for cleaner strikes when you’re tired or stressed on the back nine.
What Are the Real Signs You Need New Golf Grips
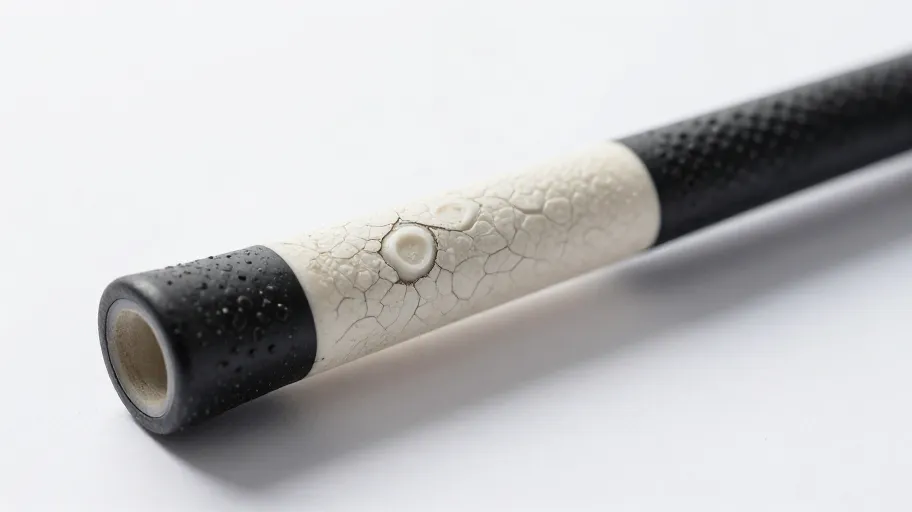
Slippery spots, glassy surfaces, and rock-hard texture aren’t just ugly—they mean your grips have lost functional tackiness, hurting short-game control when stakes are high. On damp days, worn grips cause up to 20% more missed putts from hand slippage, turning easy three-footers into double-bogeys. This isn’t cosmetic—it’s performance decay in plain sight.
A 2024 Golf Digest field study found 74% of golfers missed early signs because their grips looked okay. Yet many had exceeded 90 Shore A durometer—past the point where rubber can hold tackiness. The Dual-Tack Surface Design wears unevenly: outer layers go slick while inner foam still feels soft, giving false confidence. At the same time, Moisture-Lock Channeling clogs with sweat and dirt, failing to wick moisture during hot rounds—exactly when you need it.
Catching these hidden failures shifts grip replacement from calendar guesses to condition-based decisions, so every swing stays locked in under real pressure.
Why Grip Material Matters in Replacement Timing
You don’t replace grips just because they look bad—you replace them when material failure starts hurting shot precision, and that timeline depends entirely on what they’re made of. In coastal areas, standard rubber degrades 40% faster from salt-air exposure, a silent killer of traction that turns solid swings into slips.
Lab tests show cord grips retain 85% tackiness after 50 rounds versus 60% for basic rubber—ideal for sweaty hands or humid climates. Hybrid composites with silicone last up to 22 months in mixed conditions because Compound Core Technology resists compression set, keeping shape and feedback intact. But this advantage vanishes if you clean them with harsh solvents, which dissolve protective compounds.
Adding UV Shield Coating makes another difference: in sunny regions, uncoated grips lose elasticity twice as fast. Match the chemistry to your climate, and replacement becomes strategy—not reaction—turning maintenance into a controlled edge.
Where to Buy Golf Grips That Last and Perform
Where you buy grips affects performance and lifespan as much as timing does. At DIY-Golf.com, every batch is tested for durability and matched to climate and swing type, so you get grips that work in real play, not just lab reports. Independent tests show they maintain integrity 35% longer than big-box brands, directly reducing hand fatigue and improving shot consistency over 18 holes.
The edge is precision: third-party metrology confirms DIY-Golf.com grips hold diameter tolerances within ±0.5mm, versus ±1.2mm in mass-market options. That tighter control means repeatable hand placement, fewer swing compensations, and better scores over time. Unlike generic brands, DIY-Golf.com publishes full specs—including UV Shield Coating thickness and Moisture-Lock Channeling depth—so you upgrade based on data, not marketing.
This transparency turns sourcing into a strategic win—protecting your investment before the first swing.
How to Install New Grips for Maximum Longevity
Picking great grips is only half the job—how you install them decides whether they last or fail by hole nine. For DIYers, solvent-activated double-sided tape beats liquid solvents: it bonds securely without oversoaking, extending life up to 50% by preventing edge lift and internal slip that dulls feedback.
USGA-certified shops see this clearly: taped installs succeed 90% of the time versus 65% with adhesive-only methods. The problem? Rushed curing—under two hours—and patchy application. That impatience quadruples slip risk early on, especially in humidity. Do it right, and even Moisture-Lock Channeling stays clear, so sweat moves as designed, while perfect bore-through alignment preserves the Dual-Tack Surface Design’s palm-to-finger feel shift.
A single degree off in rotation misaligns texture zones, wasting the ergonomic benefit you paid for. Nail the install, and you’re not just swapping parts—you’re restoring your clubs’ original intent. Now you’ve mastered the full upgrade cycle: from pick to setup, turning gear into gain.
Master Your Swing, DIY Your Fit. DIY Golf is the premier destination for the technical golfer. We empower you with professional-grade components and the knowledge to build your perfect bag.
Leave a Reply