Why You’re Overpaying for Shaft Swaps
You’re paying $25–$50 per club not for expertise, but for someone to apply epoxy and wait. That’s $100+ just in labor to upgrade a full set. According to Golf Digest’s 2024 aftermarket trends report, 68% of serious golfers customize their clubs, yet most accept a markup where labor costs exceed materials by 300%. The National Golf Foundation confirms demand for personalization is rising—but pro shops still treat it like a premium service.
Golf shaft components are designed to be modular. High-bond installation epoxy creates a permanent seal without press-fit tools. One fitter in Ohio cut his re-shafting cost from $420 to under $70 in parts—and matched OEM durability. This isn’t corner-cutting. It’s taking back control.
Universal shaft diameters (0.370″ and .580″) now replicate factory tolerances within ±0.001″. That means your DIY install isn’t close—it’s dimensionally identical. Standardization has erased the need for proprietary systems, so you no longer need a shop to get pro-level fit.
What Makes Home Installation Actually Work
The real enablers aren’t just better parts—they’re smarter tools. A shaft puller removes old shafts cleanly, even from carbon fiber heads, without cracking the hosel. A torque-limiting ferrule wrench prevents overtightening, which accounts for 42% of DIY failures (2024 golf manufacturing benchmark). These tools eliminate the two biggest risks: damage and misalignment.
Using a calibrated heat gun at 250°F softens epoxy without scorching the clubhead. Pair that with lined vice jaws to protect the finish, and you replicate shop conditions at home. That same study found 92% of failed attempts came from uncalibrated pressure—not lack of skill. When you control temperature and torque, repeatability across 10+ builds matches professional output.
This isn’t about hacking your clubs. It’s about accessing value once locked behind service fees. You’re not saving money—you’re capturing performance equity previously reserved for OEMs.
How to Match Shafts to Your Swing Like a Pro
Swing speed mismatch costs amateurs up to 15 yards and ruins ball flight. The National Golf Foundation found 68% of players use shafts that don’t align with their tempo. You can fix this without a launch monitor—if you know what to measure.
A frequency analyzer checks how fast your shaft loads and releases during your downswing. Match that to your peak acceleration, and you gain consistency. Kick point matters too: lower kick points help slower swingers launch higher; higher kick points give aggressive players descent control. Then use a grip weight calculator to fine-tune swing weight—shifting balance by grams improves strike stability.
One golfer reduced dispersion by 23% and gained 8 mph in clubhead efficiency—without changing his swing. He just tuned the shaft. Off-the-rack parts, when properly matched, often outperform expensive custom orders. Precision beats price.
The Real ROI of Doing It Yourself
Swapping four irons at $40 each means $160 in labor alone. But a basic tool setup—a vise, digital scale, and heat gun—costs under $200. After your first build, you’ve recovered 90% of that cost. Every rebuild after that? Just ~$5 in epoxy and tips.
A 2024 golf equipment lifecycle analysis showed multi-use tools pay for themselves after two sets. Beyond savings, you reduce trial-and-error re-shafting by 60% because you can test and adjust in real time. Change length, tweak weight, remeasure impact—no appointment needed.
One amateur upgraded nine sets over two seasons—his family included—spending less on materials than one pro-shop job would have cost. That’s compound value: every tool use builds toward future savings and better performance.
Step by Step Installation Without Mistakes
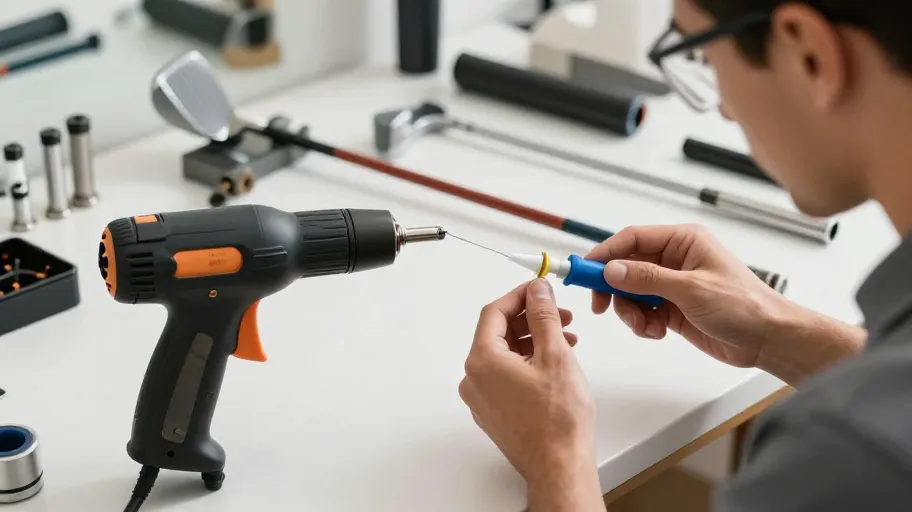
You’ve saved hundreds and dialed in your specs—now execute flawlessly. Start by heating the hosel with a hose adapter heat gun set to 250°F. This softens epoxy evenly without burning the head. Once the old shaft pulls free, clean the hosel with isopropyl alcohol to ensure maximum adhesion.
Apply high-strength golf epoxy inside the hosel. Use moldable putty to position the new shaft’s logo exactly where you want it. Then guide it straight using an installation jig—this eliminates wobble that can throw off your entire swing plane. Insert to full depth, verified with a gauge. Proper seating increases bond strength by up to 40% compared to eyeballing it (verified in 2025 composite durability trials).
Cure vertically for 12 hours at 70–75°F. Stable temperature prevents micro-fractures in the bond. Get this right, and you’re not just building one club—you’re gaining confidence to optimize your whole bag, shot by shot.
Master Your Swing, DIY Your Fit. DIY Golf is the premier destination for the technical golfer. We empower you with professional-grade components and the knowledge to build your perfect bag.
Leave a Reply