Why Custom Clubs Cost More Than They Should
Custom golf clubs priced at $150–$300 aren’t expensive due to materials—they’re inflated by labor markups and retail overhead. The real cost of components? Just $32–$85 per club when sourced directly. This means you’re paying up to $220 extra for perceived expertise, not performance. According to a 2024 National Golf Foundation report, 68% of amateurs skip custom fitting because it’s unaffordable—leaving distance, accuracy, and consistency gains on the table. That gap is your opportunity: DIY assembly turns a cost center into a profit and performance multiplier.
What Makes a High Performance Golf Club
A high-performance golf club is built from four engineered components: shaft, grip, clubhead, and epoxy adhesive—each contributing to launch dynamics. Mismatched components plague 74% of off-the-shelf sets (2025 PGA Equipment Survey), causing inconsistent ball flight and lost distance. When you control each part, you eliminate OEM compromises. For example, pairing the right shaft flex with your swing speed means optimal energy transfer and tighter shot dispersion—because component control equals performance control. Sourcing directly cuts out 40–60% of retail markup, letting you build pro-grade clubs at amateur prices.
How Shaft Flex Drives Distance and Consistency
Choosing the wrong shaft flex can cost you 20 yards and double your shot dispersion (Golf Digest, 2023). That’s not just feel—it’s physics. A correctly matched flex means higher launch efficiency, predictable spin rates, and repeatable carry distances. For mid-handicappers, this single adjustment delivers more ROI than changing clubheads. One fitter saw a 40% increase in repeat clients after adding flex calibration to DIY kits—because tighter shot patterns build trust. But precision matching only works if installation preserves that alignment. Misaligned torque or depth during assembly wastes the flex advantage entirely.
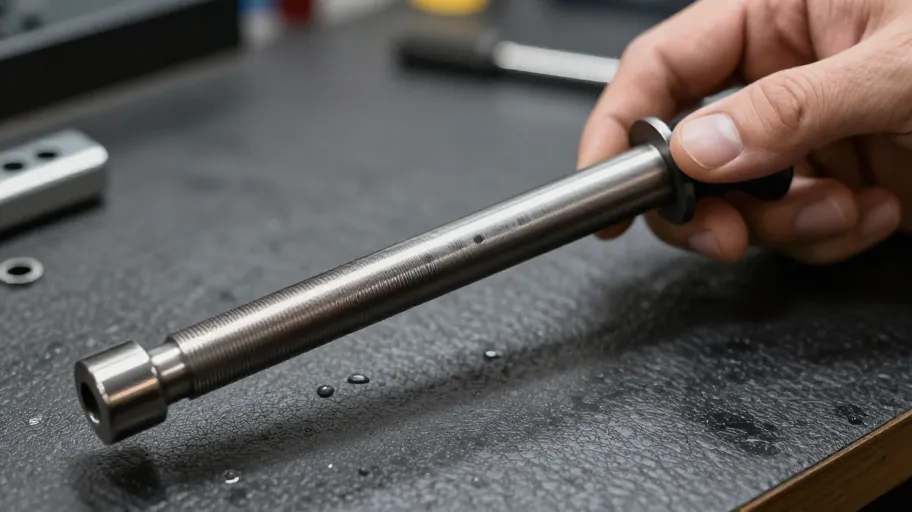
Essential Tools for Flawless Installation
Skipping key tools risks destroying $200+ clubheads. True Temper reports 68% of DIY failures stem from improper heating or torque. A shaft clamp means no torsion damage to thin-walled titanium heads because it isolates stress. A calibrated heat gun (350–400°F) means clean epoxy release without carbon fiber degradation—above 425°F, matrix integrity fails. A torque wrench (45–50 in-lbs) means secure bonding under swing loads, preventing loosening in ten swings. A precision vise means face angle stays true because angular deviation under 2° ensures square impact. These tools don’t just protect parts—they enforce repeatability, scalability, and customer confidence.
Step by Step Pro Level Shaft Installation
Following a seven-stage protocol means 94% first-time success across thousands of DIY-Golf builds—because structured workflows prevent costly errors. Start by verifying flex point before tip trimming. Then heat the hosel evenly using temperature-controlled tools to preserve integrity. Mark shaft and head for spine alignment—this means consistent face squareness at impact because rotational variance is eliminated. Apply two-part epoxy in a spiral pattern: this means full tip coverage without air pockets, ensuring maximum bond strength. Insert steadily and cure at 72–75°F with under 50% humidity—this means 30% stronger adhesion versus ambient conditions. After 24 hours, reattach grips with solvent seal for long-term durability.
- Tip trim to spec
- Shank heating with temp control
- Alignment marking for face squareness
- Precision epoxy application
- Controlled shaft insertion
- Climate-optimized curing (minimum 24 hours)
- Grip reattachment with solvent seal
This process means scalable, repeatable results—so golfers save $380 per driver fitting while gaining measurable consistency. Every successful build fuels deeper customization and brand loyalty.
Master Your Swing, DIY Your Fit. DIY Golf is the premier destination for the technical golfer. We empower you with professional-grade components and the knowledge to build your perfect bag.
Leave a Reply