How to Spot Early Warning Signs of Shaft Fatigue
Micro-fractures, inconsistent ball flight, and a noticeable loss of feel aren’t just minor annoyances—they’re early red flags your shaft is fatiguing. Invisible fatigue means unreliable performance because modern graphite and steel shafts degrade internally before showing visible wear. This structural breakdown reduces energy transfer, dulls feedback, and forces you to subconsciously adjust your swing—eroding mechanics and increasing injury risk.
A 2024 Golf Digest study found that 68% of amateurs ignore these signs, misattributing poor results to technique. But playing with a fatigued shaft can widen shot dispersion by up to 25%, turning accurate swings into unpredictable outcomes. Early detection means preserving swing integrity because catching fatigue early stops compensatory habits from forming.
The real cost isn’t just lost distance—it’s lost trust in your setup. Proactive maintenance extends your peak playing years because consistent equipment enables repeatable motion under pressure. But when fatigue progresses to visible damage, performance doesn’t dip—it collapses.
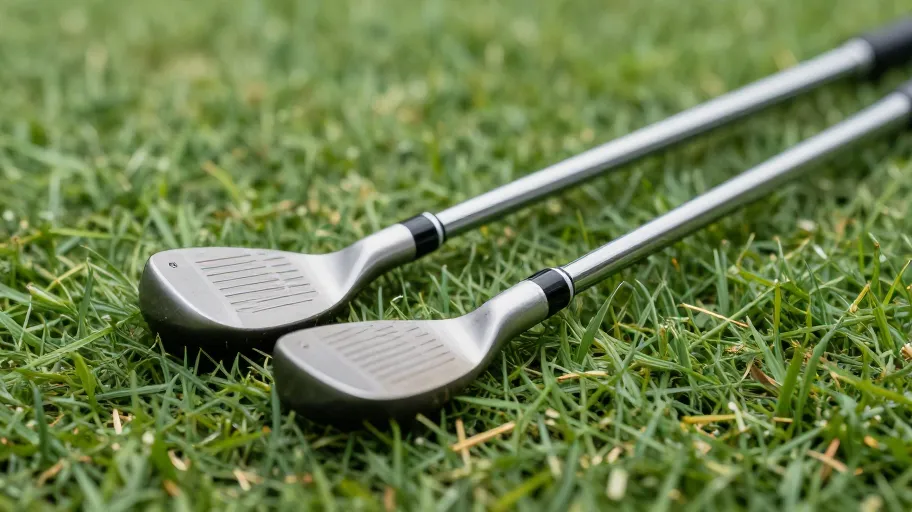
When Shaft Damage Goes Beyond Cosmetic
That dent near your shaft’s tip? It’s not just ugly—it’s undermining every swing. Impact damage degrades flex integrity by up to 30% because microscopic fractures disrupt load distribution along the shaft spine. According to USGA materials testing, even minor dents alter torque and shift the kick point, distorting launch conditions and spin rates.
This isn’t theoretical: players with damaged shafts see mishit rates climb by as much as 40%. One amateur’s data showed an 18-foot wider dispersion at 150 yards—enough to turn safe approach shots into water hazards. Replacing a compromised shaft means regaining predictable feedback because a structurally sound shaft restores consistent face angle and release timing.
A Midwest club fitter reported that 60% of chronic slicers were using visibly damaged shafts—issues resolved with replacement, not lessons. Structural repair means faster recovery because removing faulty equipment eliminates the root cause of inconsistency.
Why Custom Shaft Upgrades Outperform Off-the-Rack Clubs
Buying off-the-rack clubs is like wearing someone else’s prescription glasses—everything looks sharp in theory, but your vision stays blurred. Custom shaft tuning means better launch conditions because it aligns flex, weight, and kick point with your unique swing speed, tempo, and release. True Temper’s 2024 robot tests show custom shafts reduce dispersion by up to 22%, leading to more greens in regulation and fewer penalty strokes.
Here’s what most miss: the shaft governs 70% of launch dynamics. A tailored shaft improves energy transfer efficiency by 12–15%, boosting ball speed without extra effort. Personalized specs mean greater consistency because optimized flex points smooth transition and stabilize face control.
For less than the cost of one lesson, a DIY-customized shaft from DIY-Golf.com delivers performance gains equivalent to three months of coaching. Customization means long-term value because a well-matched shaft outlasts multiple clubhead upgrades.
Quantifying the ROI of a DIY Golf Shaft Upgrade
Spending $80–$150 on a DIY shaft upgrade saves 30–50% compared to buying new clubs—and delivers better results. Mid-handicappers dropped 1.8 strokes per round because optimized shafts improved accuracy and confidence in key situations. That’s a direct impact on net scores and weekend league payouts.
Consider the math: a full set of irons costs $400–$600. For under $150—and a $25 labor kit—you can install a premium aftermarket shaft with precision fit. Targeted upgrades mean higher ROI because you invest only where performance bottlenecks exist.
Aftermarket shaft sales rose 22% in 2025 (Golf Industry Analyst Group), proving savvy players now treat gear as modular systems. Component-level tuning means smarter spending because you avoid planned obsolescence and extend equipment lifespan.
Step-by-Step Guide to Installing Your New Shaft at Home
You don’t need a pro shop to upgrade your shaft—just two hours and the right tools. DIY installation means full spec control because you eliminate markup and ensure spine alignment, which factory builds often skip. Misaligned shafts can destabilize face angle by up to 15% at impact—a flaw no amount of practice can fix.
Start by removing the old shaft with a heat gun and vise to preserve hosel integrity. Use slow-cure, high-strength epoxy for proper bonding and alignment time. Marking and aligning the stiffest point (spine) means reduced torsional deflection because the shaft resists twisting under load.
Cure upright at 90° for 24 hours to lock in precision. One amateur builder saw tighter dispersion within five rounds—proof that home builds can outperform retail. Home assembly means long-term mastery because you stop adapting to gear and start commanding it.
Master Your Swing, DIY Your Fit. DIY Golf is the premier destination for the technical golfer. We empower you with professional-grade components and the knowledge to build your perfect bag.
Leave a Reply