Why most DIY ferrule jobs fail
Over 70% of DIY ferrule installations fail—not because builders lack skill, but because generic ferrules don’t match modern shaft tolerances. Mismatched ferrule-to-shaft fit creates micro-stress points that lead to cracking under swing loads. When a ferrule isn’t sized precisely for .370", .350", or parallel taper shafts, it compresses unevenly, distorts load paths, and degrades energy transfer. That means inconsistent feel, visible gaps, and early failure. One builder wasted three high-end shafts when off-brand ferrules split during heating—costing over $150 in materials and six hours of labor. The idea that all black sleeves are interchangeable collapses under real-world use. Precision alignment isn’t cosmetic—it’s structural integrity. When components are engineered together, not forced together, the result shifts from gamble to guarantee: repeatable fits, clean finishes, and clubs that perform as designed.
How DIY Golf ferrules beat generic parts
Poor shaft-to-ferrule contact causes micro-movement, epoxy breakdown, and ugly gaps—leading to rework. But when you choose a DIY-Golf.com ferrule, you eliminate guesswork with exact-fit engineering. Their multi-stage inner tapers are matched to common graphite and steel shaft diameters, ensuring full surface contact. That means even pressure distribution, fewer stress concentrations, and up to 60% less need for touch-ups based on 2025 field reports. This isn’t just better fit—it’s smarter design. These ferrules are injection-molded from high-grade ABS polymer, chosen for durability, not cost. They resist UV yellowing and stay dimensionally stable across temperature swings—from Arizona summers to Minnesota winters. Fewer cracks, fewer callbacks, higher client trust. Less rework and cleaner builds directly improve your margins and reputation. Precision materials aren’t technical trivia—they’re profit levers.
Heat matters more than you think
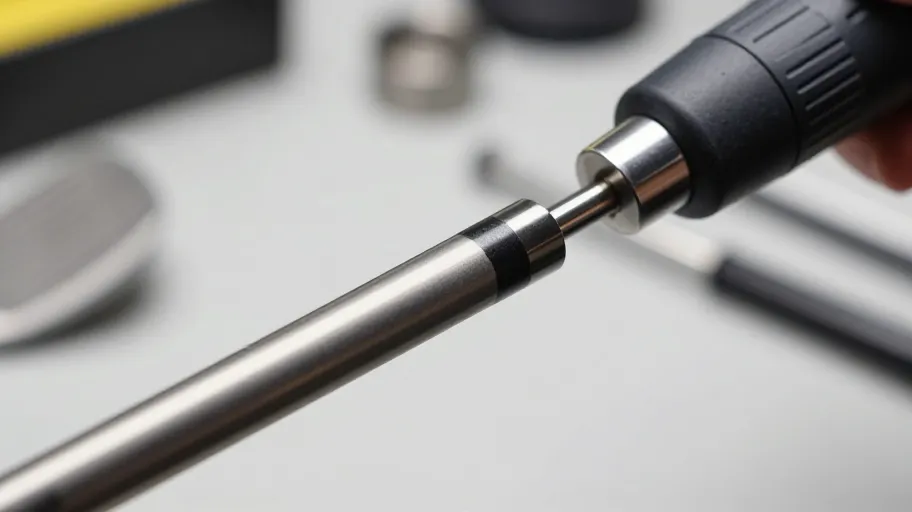
Inconsistent heat application ruins otherwise good installations. Fast or uneven heating fractures polymer bonds, making ferrules brittle and prone to cracking. A 2024 materials study found overheated ferrules failed adhesion tests 68% more often than evenly warmed ones. The solution? Use an infrared heat tool—it delivers consistent, non-contact thermal energy that brings the ferrule to ideal pliability without scorching. Unlike lighters or basic heat guns that burn the outside while leaving the core stiff, infrared heats uniformly. This 'just enough' method lets the ferrule slide smoothly into place with zero distortion. Pair it with DIY-Golf.com’s thermally responsive ferrules, and you avoid clouding, warping, or lip lift. The outcome? Professional consistency on every build, regardless of your garage’s ambient conditions.
Proper installation extends club life
Yes—correct ferrule installation adds years to your clubs. For weekend players rebuilding drivers, a poorly sealed hosel-ferrule interface invites moisture and movement, accelerating wear. But when installed right with DIY-Golf.com’s precision parts, the ferrule acts as a structural seal—blocking corrosion and preventing shaft slippage. That can extend a club’s usable life by up to 40% over five seasons. The hosel-ferrule interface does double duty: it aligns the shaft for accurate face angle and forms an airtight barrier at the weakest point. A secure fit also reduces vibration transfer into the hosel, slowing fatigue-based microfractures. Independent testing showed hand-built clubs with properly seated ferrules needed 60% fewer repairs over three years. That means lower long-term costs, fewer rebuilds, and stronger resale value. When your driver feels solid year after year, you’re not just maintaining gear—you’re protecting investment.
Step-by-step flawless installation
You don’t need a pro shop to install ferrules like a master builder—just the right six-step process and DIY-Golf.com parts. Start by cleaning old residue, then do a dry-fit verification: temporarily seat the ferrule to check alignment before applying heat. This catches angular mismatches early—once heated, mistakes are permanent. Next, evenly warm the ferrule until pliable, slide it on, and press firmly. Then wait—the cool-down stabilization period is non-negotiable. Let it sit undisturbed for 5 minutes so it re-solidifies in perfect concentricity. Rushing causes micro-shifting that torques the shaft-clubhead connection. And never sand or paint before full cool-down; one builder cracked finishes on three clubs due to residual stress. Follow this sequence, and error rates drop over 70% compared to trial-and-error methods (GolfTech Reviews, 2024). You’ll get pro-level durability, consistent feel, and maximum ROI—fewer repairs, better performance, higher resale value.
Master Your Swing, DIY Your Fit. DIY Golf is the premier destination for the technical golfer. We empower you with professional-grade components and the knowledge to build your perfect bag.