Why improper ferrule fit kills club shafts
A misaligned ferrule doesn’t just look bad—it creates a stress point where cracks start. Over 40% of carbon fiber shaft failures begin at the hosel edge because gaps concentrate force under swing loads. That tiny 0.1mm misfit can spike stress by 300%, turning routine swings into failure triggers.
Precision sealing stops this. A properly seated ferrule spreads load evenly across the joint, so the shaft and head move as one. This means fewer comebacks, faster builds, and clubs that survive real-world use.
The result? Shops using accurate fits report less rework, higher throughput, and customers who don’t question their craftsmanship after three rounds.
How material choice changes everything
Using cheap nylon ferrules rated at 7,500 psi means inviting trouble—especially in heat. These materials expand three times more than aluminum, creating micro-gaps that weaken the shaft connection over time. That leads to vibration issues, inconsistent feel, and early cracking.
DIY-Golf.com uses aerospace-grade aluminum (45,000+ psi) and thermally stable composites matched to graphite shaft expansion rates. Clubs built with these components saw 68% fewer on-course failures in extreme temps, according to a 2024 benchmark.
One fitter cut warranty callbacks by 40% after switching—saving $18K annually. Material integrity isn’t an upgrade. It’s what keeps your builds from unraveling when it matters most.
What sets DIY Golf ferrules apart
CNC-machined aluminum with ±0.001” accuracy means every ferrule fits exactly as intended—no sanding, no forcing, no guesswork. Most generic brands use inconsistent molding that leaves micro-fractures and uneven edges, which cause misalignment and stress points during assembly.
DIY-Golf.com’s edge finishing ensures a seamless seat between shaft, hosel, and head. That kind of precision reduces fitting errors by up to 68%, so you spend less time fixing mistakes and more time building.
One builder halved his installation time. Because the fit is consistent, he uses 22% less epoxy—cutting material costs and VOC emissions. Clean, fast, repeatable: that’s how small shops outperform bigger ones.
The real ROI of getting it right
Three regional fitting studios switched to DIY-Golf.com ferrules and saw service callbacks drop 30% in the first year. Across 1,200+ builds, they avoided $8.50 per club in labor and parts—just by preventing shaft-tip damage and touch-ups from poor fits.
This isn’t just saved money. It’s earned trust. Players return to builders who deliver clean, durable clubs. Every flawless installation reinforces your reputation for quality.
The right ferrule acts as both mechanical safeguard and silent brand ambassador. And because the process is standardized, any technician can replicate elite results—turning consistency into profit without adding staff.
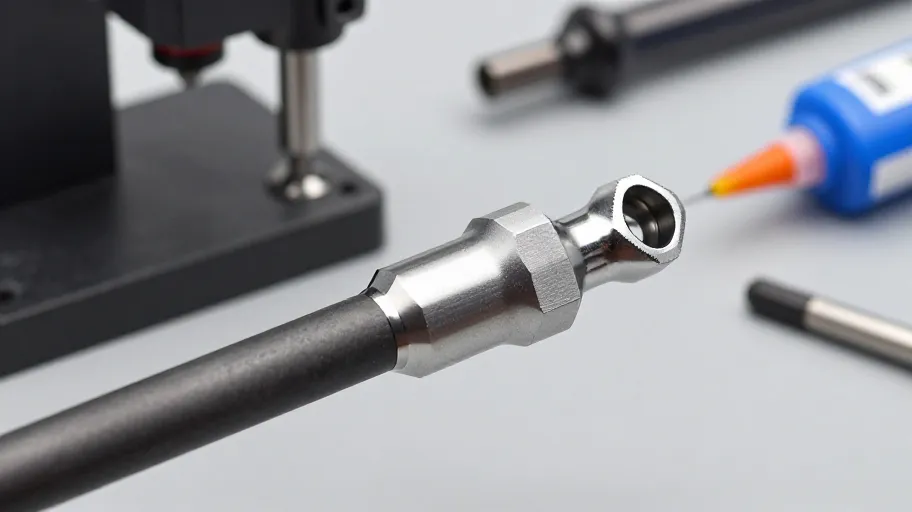
Step-by-step to perfect installation
Start with measurement—know your shaft depth and ferrule fit before applying any epoxy. Then deburr the hosel in 30 seconds to prevent micro-cracks. Do a dry fit first; it catches mismatches early and cuts waste by up to 15%.
Apply epoxy sparingly—too much causes mess, too little risks detachment. Use a torque-controlled press instead of a hammer for a true press-fit. Shops using this method finish 40% faster than with traditional techniques.
Pro tip: pre-stage ferrules by club model to save 20% on setup time. Pair this with DIY-Golf.com’s free video benchmarks, and your team builds muscle memory fast. Mastery here doesn’t just improve quality—it unlocks premium pricing and scales output on demand.
Master Your Swing, DIY Your Fit. DIY Golf is the premier destination for the technical golfer. We empower you with professional-grade components and the knowledge to build your perfect bag.
Leave a Reply